
A popup is great for directing your user’s attention to only one Call To Action or Promotion. If you’re looking to add a personalized touch to your website’s popups, you’re about to embark on an exciting journey.
In this tutorial, we’re going to craft a custom-width popup using the powerful Elementor Popup Builder.
Popups are more than just attention-grabbers; they’re your direct line of communication with your audience. By customizing the width of your popup, you can achieve a unique visual effect that seamlessly blends with your site’s design.
So, let’s explore how to create a custom-width popup that’s bound to make a lasting impression on your visitors.
Basically, we are discussing the Elementor popup builder. So, we need the installed Elementor Pro in the dashboard.
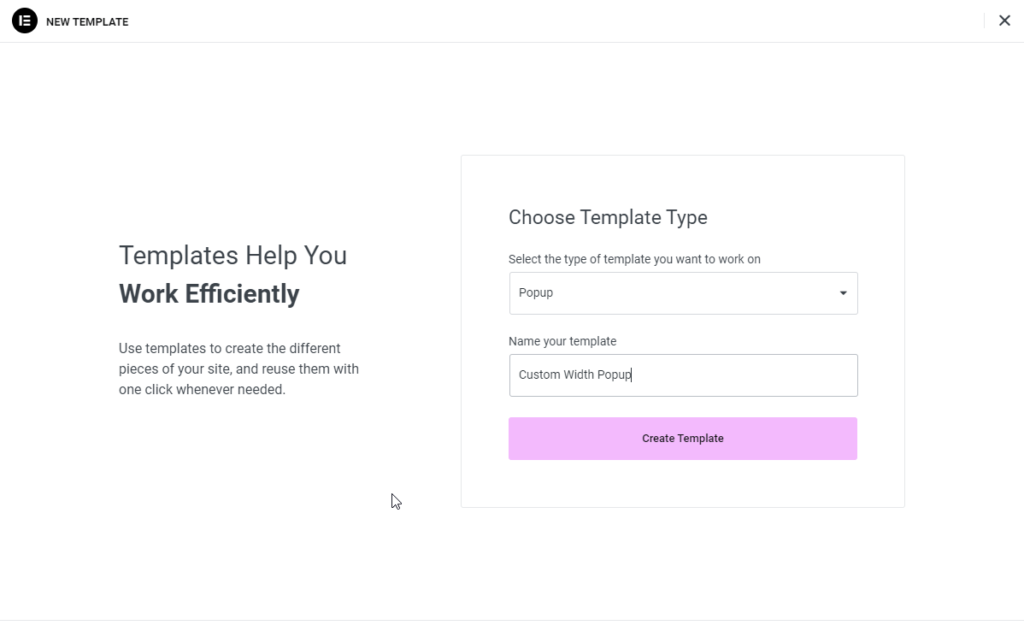
Create popup:
- Go to Dashboard > Templates > Popups > Add New
- Name your template; like “Custom width Popup” and click “Create Template”
- And, create the design that you wanted to design.
Adjusting Width: Customizing Your Popup
One of the key elements in creating an effective and visually appealing popup is getting the width. This step allows you to ensure that your popup seamlessly integrates with your website’s overall design and provides an optimal user experience.
Here’s how you can adjust the width of your popup using Elementor:
- In the popup editing tab; Click Popup Settings (in left bottom)
- For width; Click Layout > Set the Width (px, em, rem, vw)
- For the height; Click Custom and set the height (px, em, rem, vw)
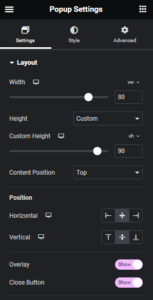
Set the Popup Position
Form the position title here two options Horizontal and vertical.
- From the horizontal tab choose the position of the popup (Left align, Center, Right align)
- In the vertical tab, you can choose the position (Top, Center, Left) and can place your popup for the window screen.
Styling
Create your popup and your need.
Condition settings of Popup